Inserting fields into custom labels
You can insert different types of objects into labels, such as text boxes, fields, barcodes, lines, and pictures.
Pre-requisites: You can edit existing labels. However, the best practice is to create a new label (which can be based on an existing label), and save the label with a new name. Refer to Creating new labels using the Label Designer for more information.
|
1.
|
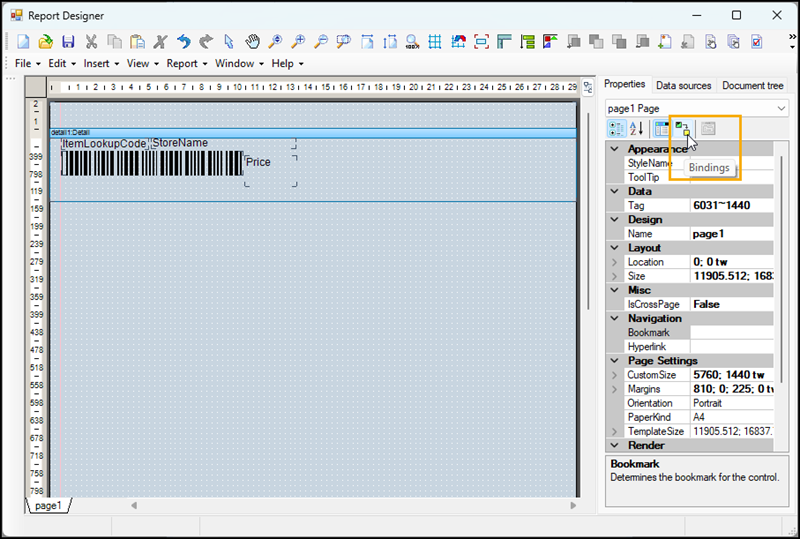
On the Properties tab, click the Bindings icon. |
|
2.
|
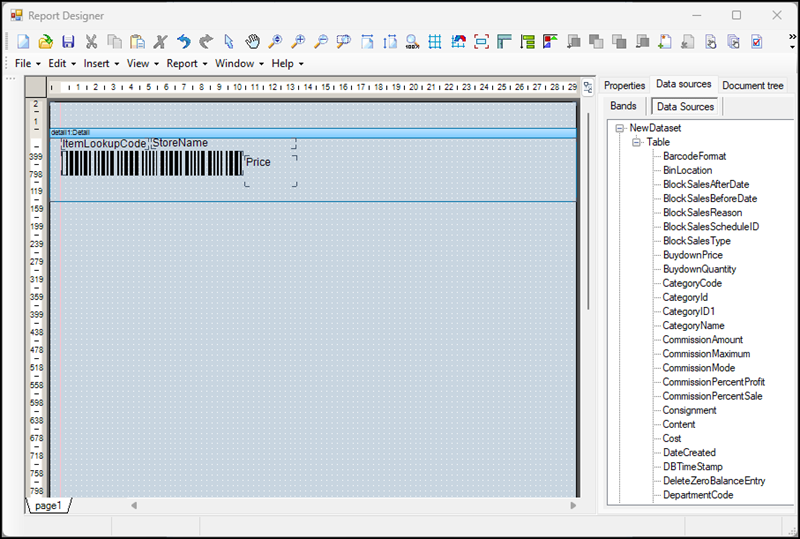
Click the Data Sources tab. |
|
3.
|
Click the second Data Sources tab. |
|
4.
|
Expand NewDataset and Table. You will see a list of fields from the RMH database. |
|
5.
|
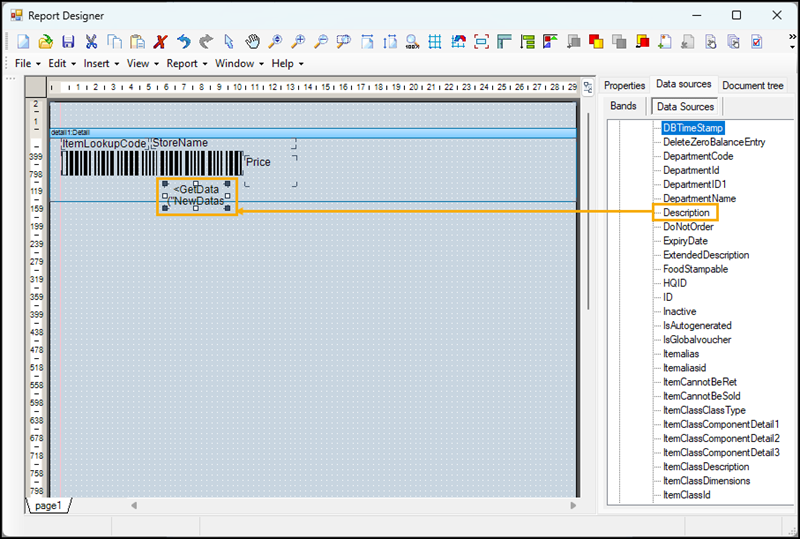
Click and drag the field that contains the information you want to display into the label, e.g., Description. The field is automatically inserted into the label. |
|
6.
|
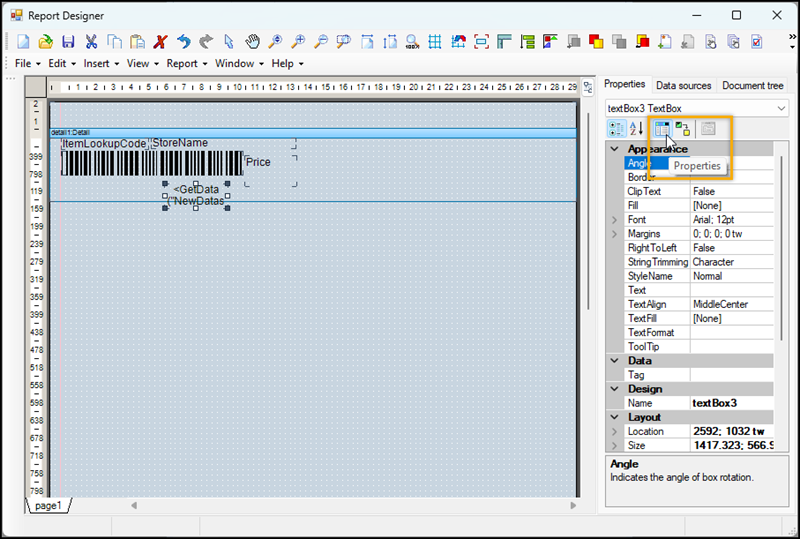
Click the Properties tab. |
|
7.
|
Click the Properties icon. |
|
8.
|
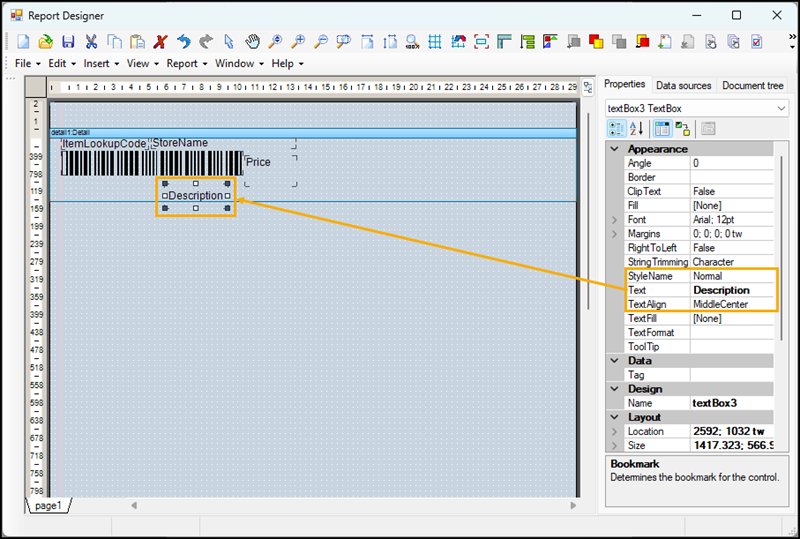
(Optional) Under Appearance, enter a description for the field next to Text. |
|
9.
|
Under Layout, adjust the field Location and Size until the field fits on the label. |
Note: Make sure that fields do not overlap with other objects in the label. Overlaps can cause printing issues.
|
11.
|
Print the label to test the field size and location, and the readability of the text. |


