Install Microsoft SQL Server
The RMH apps used Microsoft SQL Server for data storage. You must install a version of Microsoft SQL Server that is capable of meeting the store's current and future needs for data storage, memory, and processing power.
Pre-requisites: Refer to the System requirements and the RMH and SQL Server FAQ for more information.
This topic demonstrates how to install Microsoft SQL Server Express. It is provided as an example only. Refer to the official Microsoft documentation when you install SQL Server in stores.
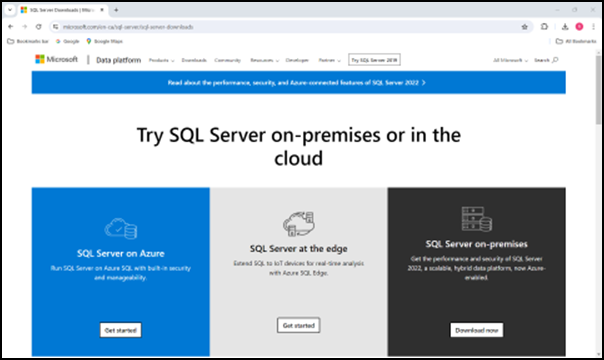
| 1. | Go to https://www.microsoft.com/en-us/sql-server/sql-server-downloads. |
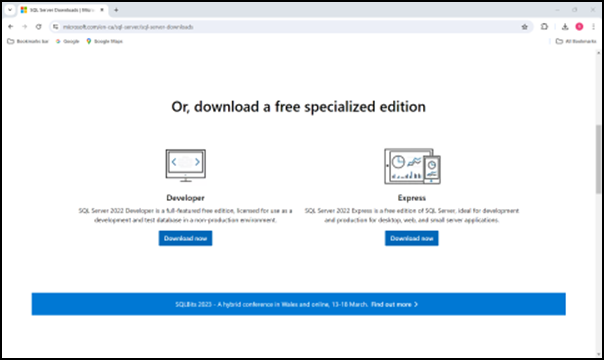
| 2. | Under Express, click Download now. The setup executable is downloaded to your computer. |
Warning! This procedure demonstrates how to install Microsoft SQL Server Express. This version of SQL Server may not be sufficient to meet a store's needs for data storage, memory, and processing power.
| 3. | Go to your Downloads folder. |
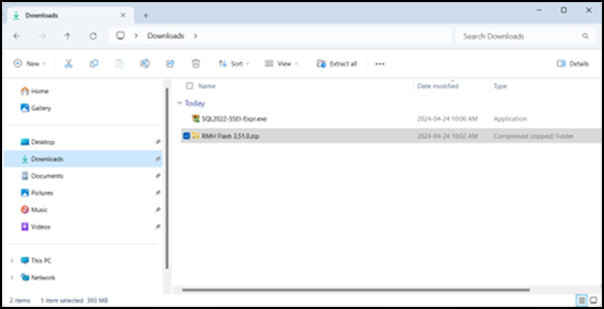
| 4. | Double-click the Microsoft SQL Server setup executable. |
| 5. | If prompted Do you want to allow this app to make changes to your device?, click Yes. |
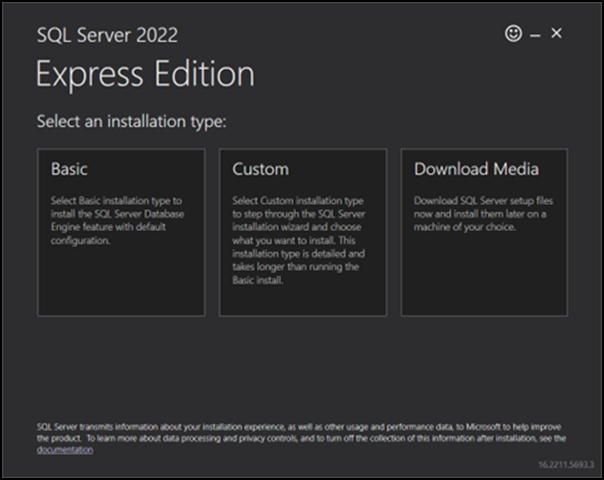
| 6. | On the Select an installation type screen of the installation wizard, click Custom. |
Note: You must select Custom so you can select the features you want to install, configure the instance name, and select the authentication mode.
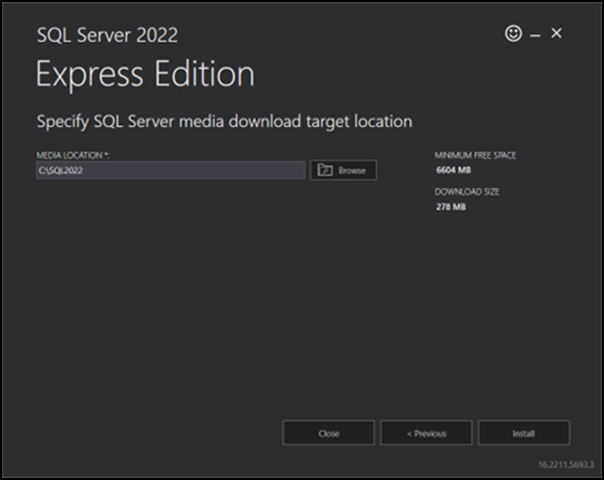
| 7. | On the Specify SQL Server media download target location screen of the installation wizard, select a download location for the installation package. |
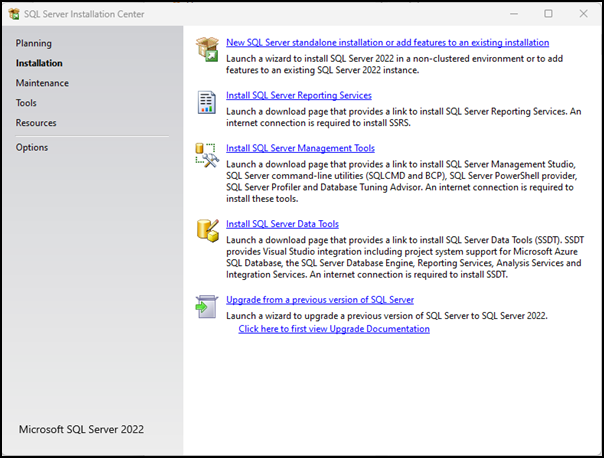
| 8. | Click Install. The installation package is downloaded and the SQL Server Installation Center dialog displays. |
| 9. | Click New SQL Server standalone installation or add features to an existing installation. |
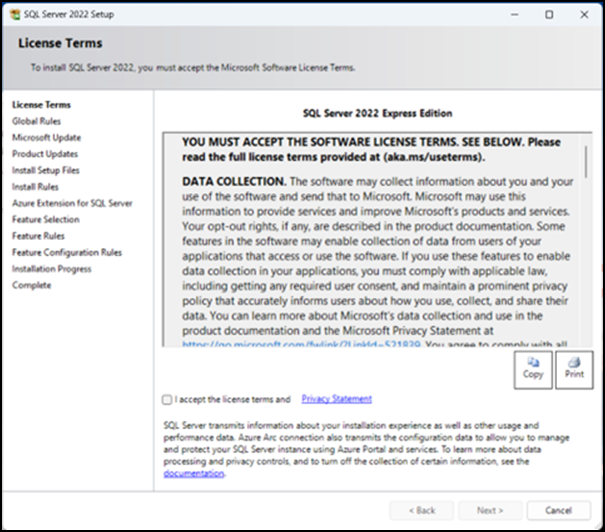
| 10. | On the License Terms screen, select I accept the license terms and Privacy Statement and click Next. |
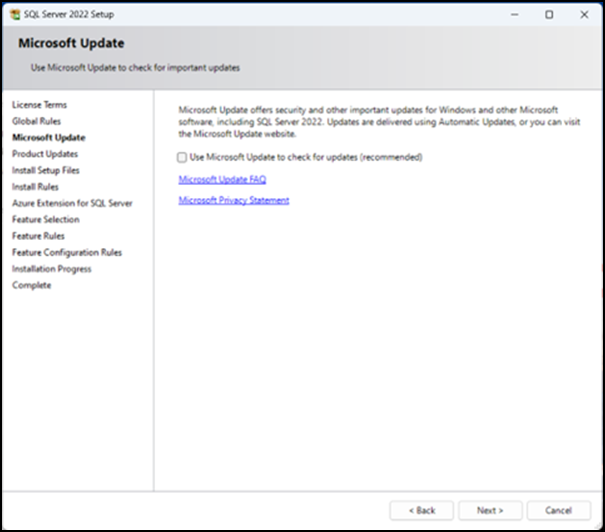
| 11. | On the Microsoft Update screen, select Use Microsoft Update to check for updates and click Next. |
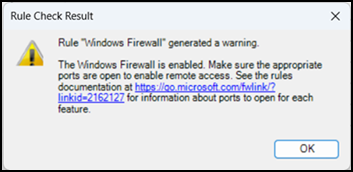
| 12. | On the Install Rules screen, review any issues that were identified and fix them, then click Next. |
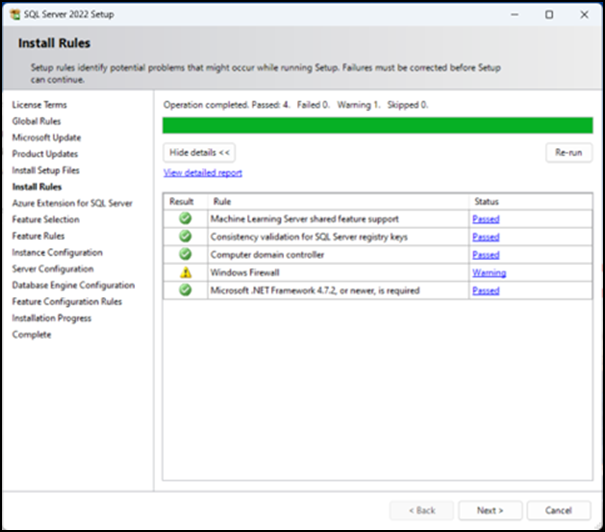
For example, there is a Windows Firewall warning because port 1433 is not open, which will prevent remote access to Microsoft SQL Server.
| 13. | On the Azure Extension for SQL Server screen, clear the checkbox beside Azure Extension for SQL Server and click Next. |

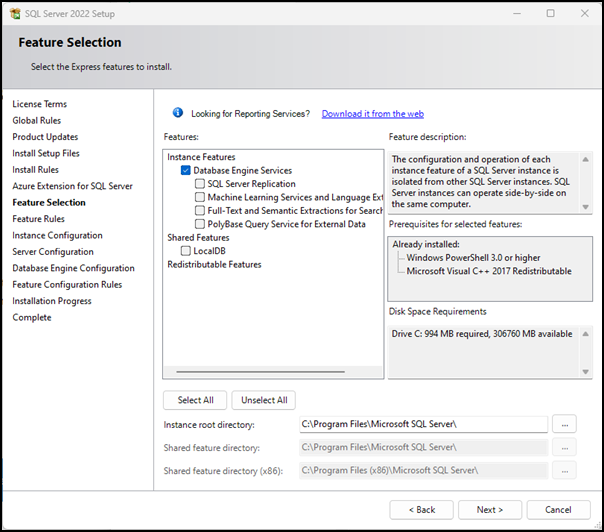
| 14. | On the Feature Selection screen, select Database Engine Services, clear all other check marks, and click Next. |
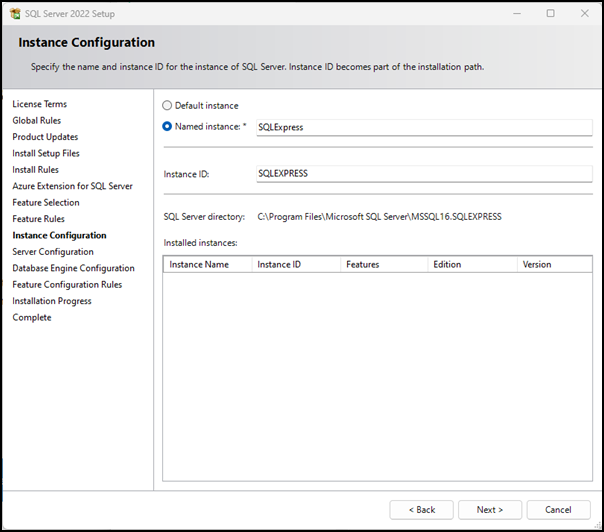
| 15. | On the Instance Configuration screen, enter a different Named instance if desired and click Next. |
| 16. | On the Server Configuration screen, accept the defaults and click Next. |
Note: You do not need to enter a Password or change the Startup Type. You also do not need to select Grant Perform Volume Maintenance Tasks privilege to SQL Server Database Engine Service.

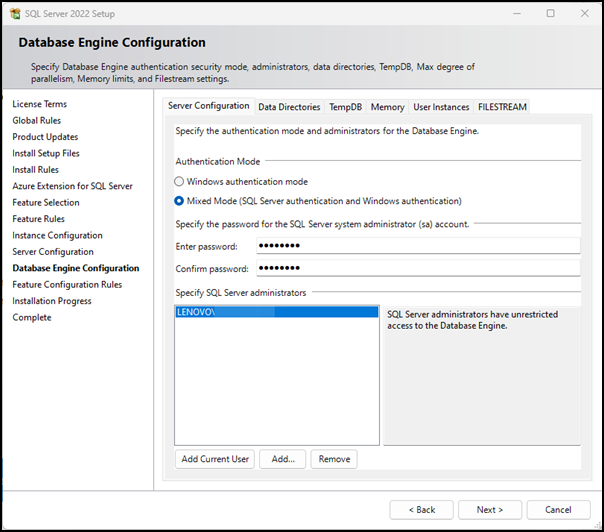
| 17. | On the Database Engine Configuration screen, select Mixed Mode and enter a password. |
Warning! This is the most critical step in the installation. When you connect to the SQL Server, you want to use SQL Authentication. If you use Windows Authentication, the owner of the database will be the Windows user. If you use SQL Authentication, the owner of the database will be a SQL user.
| 18. | Wait while installation and configuration are completed. This may take a few minutes. |

| 19. | On the Complete screen, review the installation results. |
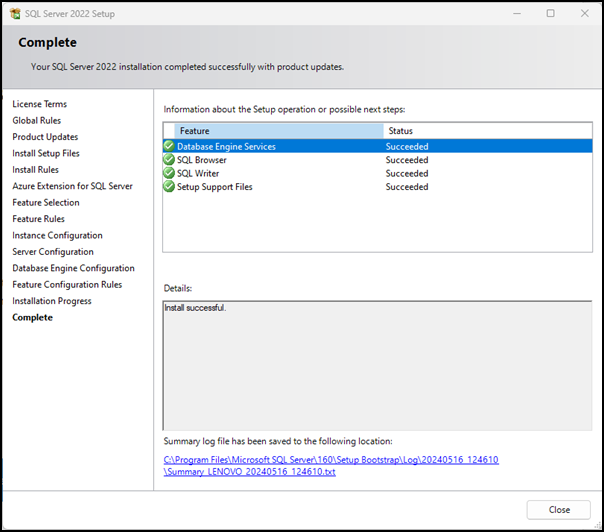
| 20. | Click Close. |
Note: If the Microsoft SQL Server instance is installed on a remote computer, you will need to enable TCP/IP and open port 1433 to allow the RMH apps to communicate with SQL Server.