Creating a transfer in requisition
If you use transfers to move items into inventory from a warehouse or from a larger store, you can use transfer in requisitions to partially automate the process of adding items to a transfer order. With the Transfer In Requisition wizard you can automatically add items to the requisition based on reorder information or recent sales. You can also add items based on department, category, or supplier, or use the filter to identify which items to add. When you commit a requisition a transfer order is created.
|
1.
|
Click Inventory/Purchasing. |
|
2.
|
Click Transfer In Requisition. |
|
4.
|
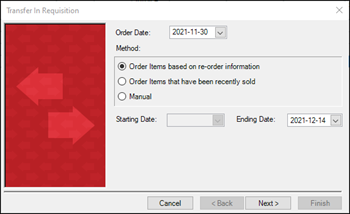
Select one of the following: |
-
Order items based on re-order information: Select this option if you want to use the Reorder Point and Restock Level defined for the item to add items and quantities to the transfer in requisition.
-
Order items that have been recently sold: Select this option if you want to use Sale History to add items and quantities to the transfer in requisition.
-
Manual: Select this option if you want to manually add items and quantities to the transfer in requisition.
|
5.
|
Select the Starting Date and Ending Date as required. |
|
7.
|
From the Selection Type drop-down, select one of the following: |
-
Department
-
Category
-
Supplier
-
Advanced Filter
|
8.
|
If you selected Department, Category, or Supplier: |
|
9.
|
If you selected Advanced Filter: |
|
b.
|
Use the Filter dialog options to identify the items. |
|
11.
|
Click the Accept check box for the requisition. |
|
13.
|
Click OK to confirm the transfer in was created. |
|
14.
|
Click Transfer Ins to view the transfer in. |
|
15.
|
Enter any additional information required to process the transfer in. |
|
17.
|
Click Release to release the transfer in. |
|
18.
|
Click OK to confirm that you want to release the transfer in. The Order Status changes to Released. |