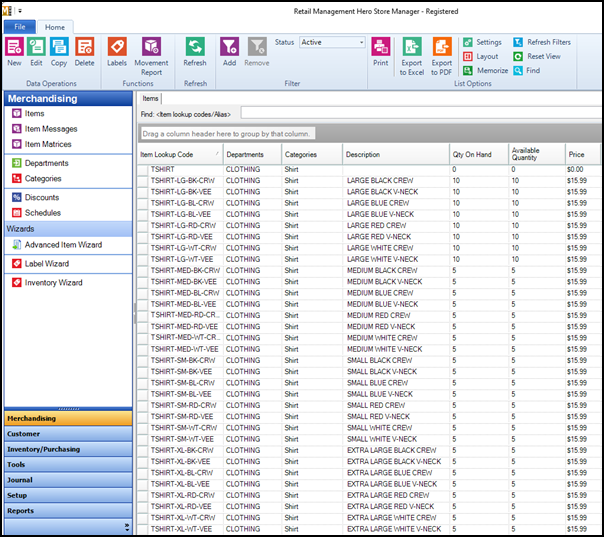
Setting up matrix items
Note: It is recommended that you set up suppliers before you enter a large number of items.
|
3.
|
To add a new item, click New. |
|
4.
|
Select Matrix Item and click OK. |
|
5.
|
Use the General tab to enter general information about the item.  SHOW MORE INFO SHOW MORE INFO |
| Matrix lookup code |
A unique lookup code for the matrix item. The item lookup codes for component items are composed of the matrix lookup code, an optional separator character, and the attribute codes defined for each dimension.
Note: Item lookup codes can contain a maximum of 25 characters. You should ensure that the matrix lookup code, optional separator character, and attribute codes total 25 characters or less. Longer item lookup codes will be truncated.
|
| Description |
The name or description of the matrix item. |
| Sub Description 1, 2, 3 |
You can rename this field and use it to define additional attributes for the item, e.g., Size, Colour. |
| Notes |
Any notes that you want to enter about the matrix item. |
| Department |
The department the item belongs to. Note: Define departments using Setup | Merchandising | Departments. |
| Category |
The category the item belongs to. Note: Define categories using Setup | Merchandising | Categories. |
| Item Tax |
The tax that is applied to the item when it is sold. Note: Define item tax using Setup | Financial | Item Taxes. |
| Price |
The price that is initially applied to all component items.
Tip: You can use the Advanced Item Wizard and Task 110: Change Item Prices to change the prices for specific component items after they are added to the store database. For example, if you are creating a matrix item for t-shirts, you might enter $15.99 as the initial price for all component items, but change the price of XXL t-shirts to $16.99 and the price of XXS t-shirts to $14.99.
|
| Cost |
The amount the store paid to purchase the item. |
| Supplier |
The primary supplier of the matrix item. Note: Define suppliers using Inventory/Purchasing | Suppliers. |
| Barcode |
The item’s barcode type. For example, the UPC barcode type is the standard type of barcode for items sold to the general public. The barcode type affects how labels are formatted and printed. |
|
6.
|
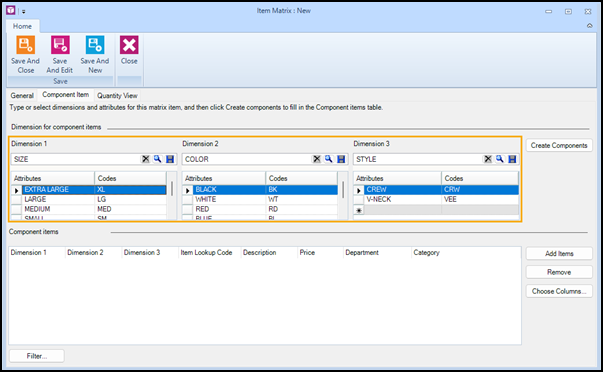
On the Component Item tab, enter the dimensions and attributes for the component items: |
|
a.
|
For Dimension 1, do one of the following: |
-
For a new dimension, enter a name for the dimension, e.g., SIZE.
-
To use a previously saved dimension, click the Search icon and select the dimension.
|
b.
|
For Attributes, enter the attributes of the dimension, e.g., EXTRA LARGE, LARGE, MEDIUM, SMALL, EXTRA SMALL. |
Note: If you selected a previously saved dimension, the attributes and attribute codes from that dimension are automatically added. You cannot remove the attributes and attribute codes from the saved dimension, but you can add new attributes and attribute codes below.
|
c.
|
For Codes, enter the codes for the attributes, e.g., XL, LG, MED, SM, XS. |
Note: The attributes are used to create the item descriptions for the component items, and the codes are used to create the item lookup codes for the component items. It is a best practice to keep the attributes and codes short.
|
d.
|
Repeat the previous three steps for Dimension 2 and Dimension 3, as required. |
|
7.
|
On the Component Item tab, create the new component items: |
|
a.
|
Click Create Components. |
|
b.
|
Click Yes to create the component items based on the dimensions and attributes you entered. |
|
c.
|
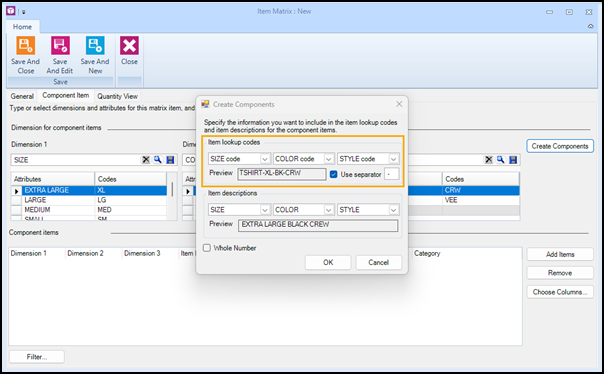
Configure the item lookup codes for the component items. The best practice is to use the suggested item lookup codes. |
-
(Optional) If you do not want to include a dimension (and the corresponding attribute codes) in the lookup code, select <None> from the drop-down.
-
(Optional) Select Use separator and enter a character, such as a dash, that will be used to separate the attribute codes in the lookup codes.
|
d.
|
Configure the item descriptions for the component items. The best practice is to use the suggested item descriptions. |
|
e.
|
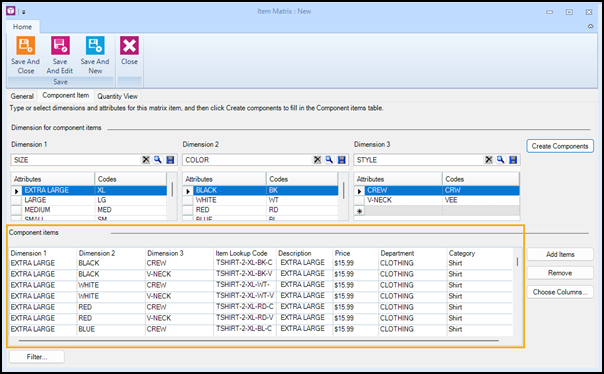
Click OK. A preview of the component items displays in the Component items grid. |
Note: At this point, the matrix item and the component items have not been added to the store database. They are added when you click Save And Close.
|
8.
|
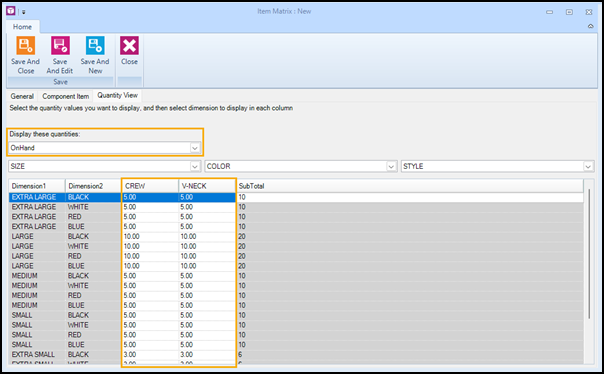
On the Quantity View tab, enter the on hand quantities of the component items. |
Note: If desired, you can also enter committed, available, on order, and transfer out quantities.
|
9.
|
Click Save And Close. The matrix item and the component items are added to the store database. If necessary, click Refresh to update the Items grid. |