Configuring the POS receipt
If you want, you can add loyalty information or coupons to your store's receipts.
Note: Some payment integrations and other POS extensions use their own receipt templates. Installing Loyalty Manager may disrupt the information these extensions may need to print on the receipt, such as credit card payment confirmation. Please contact your partner for a customized receipt template that can work with both Loyalty Manager and your POS extension.
To configure the receipt template:
|
4.
|
Click Receipt Formats. |
|
6.
|
Enter the Title and Description. |
|
7.
|
Beside the Sales field click the Browse icon. |
|
8.
|
Go to the RMH POS installation folder and open the ReceiptTemplates subfolder. |
Note: In most installations the path is C:\Program Files (x86)\Retail Hero\RMH POS\ReceiptTemplates.
|
9.
|
Select HeroPoints40.Receipt.xml. |
|
10.
|
If prompted “Would you like to update all transaction types that are currently set to 'Hero Points 4.0 Receipt - 40 column'?” click Yes. This receipt template will apply to all transaction types except for the X/Z Report. |

|
11.
|
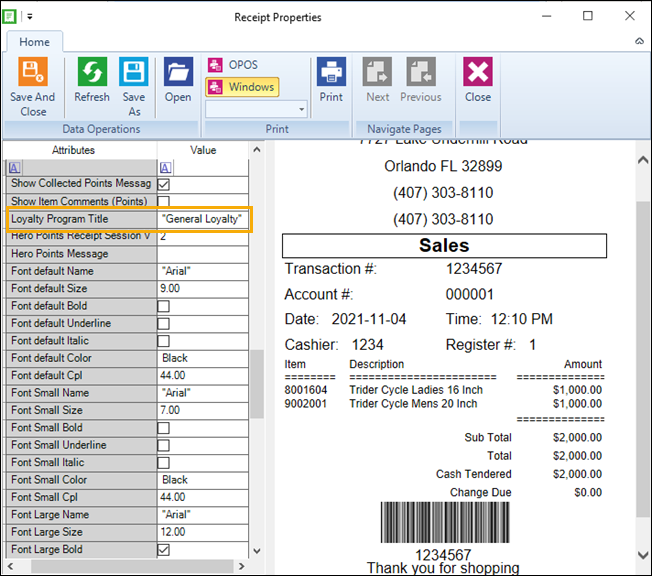
Add the loyalty program name: |
|
b.
|
Scroll down to Loyalty Program Title. |
|
c.
|
Select and delete the default loyalty program title (“Hero Points”). Enter your store’s loyalty program name, e.g. “General Loyalty”. |
|
e.
|
If prompted “Would you like to update all transaction types that are currently set to 'Hero Points 4.0 Receipt - 40 column'?” click Yes. |
|
12.
|
Click Save And Close. |
|
13.
|
The message "Each POS Station must be restarted in order for this change to take effect" displays. Click OK. |
Assign the new receipt template to the registers the will use it:
|
5.
|
Double-click the register that will use the receipt format. |
|
6.
|
Click the Printer 1 or Printer 2 tab. |
|
7.
|
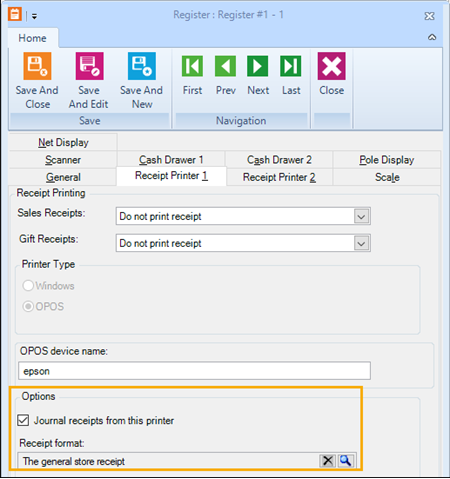
Select Journal receipts from this printer box. |
|
8.
|
Beside the Receipt format field click the Browse icon. |
|
9.
|
Select the receipt format that you created. |
|
10.
|
Click Save And Close. |