Connect to SQL Server and the Central database and force install tables
Tip: You can run Force Install Tables as an executable in Command Prompt or PowerShell. This allows you to update or repair the Central database without opening Central Administrator or Central Manager. Refer to Run Force Install Tables as an executable for more information.
|
1.
|
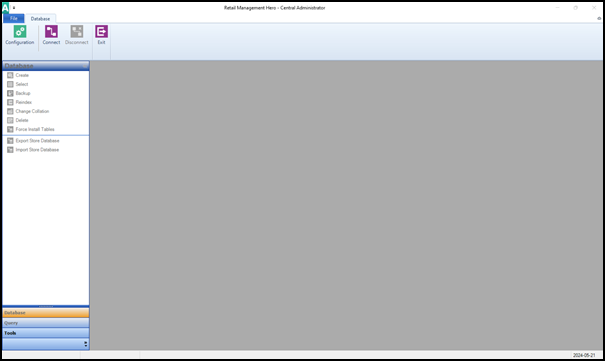
Open Central Administrator. The shortcut should be available on your desktop. |
|
3.
|
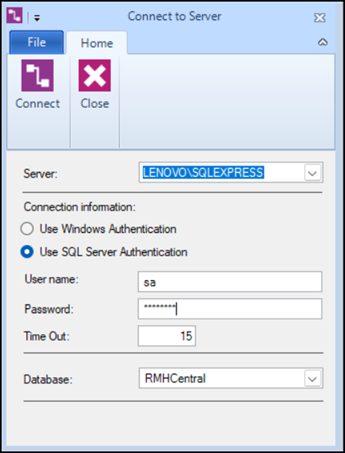
In the Server field, select the host name of the computer where you installed SQL server and the name of the SQL Server instance. |
|
4.
|
Under Connection information, select Use SQL Server Authentication. |
|
5.
|
Enter the User name and Password for the system account. |
|
6.
|
From Database, select the Central database. |
|
7.
|
Click Connect. You will notice that the functions in the Database menu are now accessible. |

|
8.
|
In the Database menu, click Force Install Tables. |
Note: Starting with release 3.11.14, the Force Install Tables function no longer creates the SYNCGUID column in the RMH or third-party app tables. The Prepare Database function will create the SYNCGUID column in the RMH table, but it will no longer create it in third party app tables.
|
9.
|
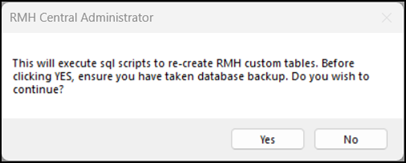
Click Yes to continue. |
|
10.
|
Wait while Central Administrator executes the SQL scripts to create RMH custom tables in the Central database. This may take a few minutes. |
|
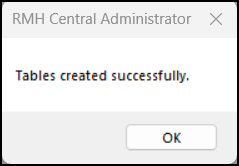
11.
|
Click OK to close the confirmation dialog. |